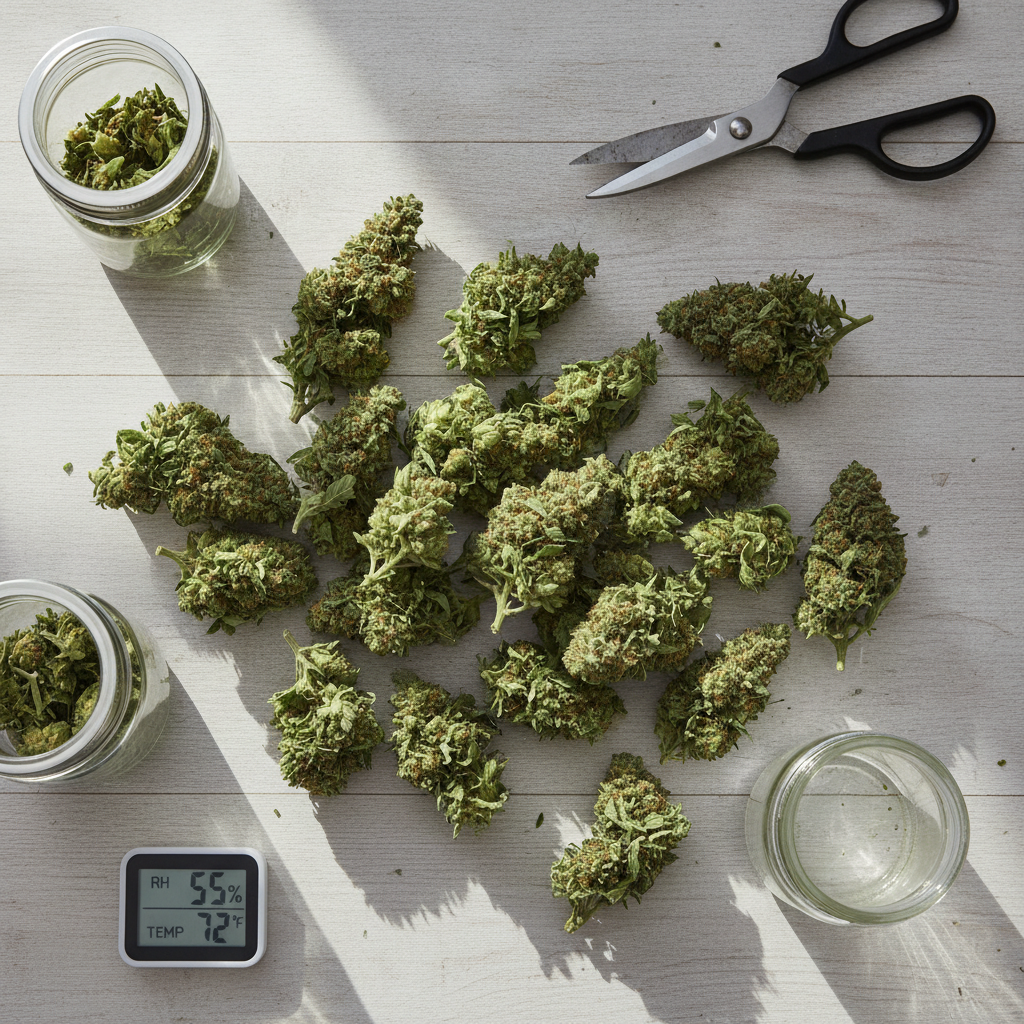
Why Harvest Is Where Most Home Grows Go Wrong
You've spent three to five months dialing in your environment, feeding schedule, and training technique. The plants look incredible. And then, in the final two weeks, something goes sideways — a rushed dry, a missed harvest window, jars that never get opened — and the end product doesn't reflect the work you put in.
This is more common than most growers admit. The cultivation phase gets most of the attention, but harvest, drying, and curing are where quality is actually made or lost. A plant that was grown perfectly can be reduced to harsh, flavorless bud by a 10-day drying mistake. Conversely, plants that struggled a bit during veg can still produce exceptional results if the final stage is handled well.
September is prime harvest season for outdoor growers across most of the US, and indoor growers running photoperiod strains that flipped to flower in June are wrapping up around the same time. Whether you're working with an outdoor garden in California or Colorado, or finishing up under lights in a VIVOSUN 4x4 grow tent, the mistakes covered here apply equally.
Let's go through the most costly errors — and exactly how to fix them.
Mistake #1: Harvesting Too Early (The Most Common Error)
Impatience is the number one quality killer in home growing. Harvesting even one week early can significantly reduce THC content, yield by dry weight, and terpene density. Plants aren't done until they're done, and breeders' stated flowering times are estimates — not guarantees.
How to Read Trichomes Correctly
The only reliable harvest indicator is trichome color, checked with a jeweler's loupe (at least 30x) or a digital microscope. Here's what you're looking for:
- Clear trichomes: The plant is still building cannabinoids. Harvesting now is like picking an unripe tomato. Wait.
- Cloudy/milky white trichomes: THC is at or near peak. The effect will be more cerebral and energetic.
- Amber trichomes: THC is beginning to degrade into CBN. Effects become more sedative and body-heavy.
Most experienced growers target a mix of roughly 70–80% cloudy with 10–20% amber for a balanced effect. If you're growing a strain specifically for sleep or pain relief, letting amber push toward 30% is reasonable. For daytime or creative use, harvest closer to peak cloudy.
Check the trichomes on the buds themselves, not the sugar leaves — leaf trichomes mature faster and will mislead you toward early harvest.
Secondary Indicators to Confirm Readiness
Trichomes tell most of the story, but these visual cues help confirm you're in the right window:
- Pistils (the hair-like structures on buds) are at least 70–90% orange or red
- Fan leaves are yellowing and beginning to drop naturally — this is the plant redirecting energy, not a deficiency
- Buds feel firm and dense rather than airy when gently squeezed
- The aroma is at peak intensity — you'll know it when you smell it
Mistake #2: Skipping the Pre-Harvest Flush
Whether or not flushing makes a measurable difference is genuinely debated among growers, and the science isn't fully settled. That said, most experienced cultivators run plain pH-adjusted water through their medium for the final 10–14 days of flower, and it's a low-risk practice that many swear by for smoother, cleaner-tasting smoke.
If you've been running a nutrient-heavy regimen — particularly if you've used synthetic nutrients like the General Hydroponics Flora Series — flushing is worth doing. Run pH-balanced water (6.0–7.0 for soil, 5.5–6.5 for hydro) through the medium until the runoff EC drops close to the input EC. In living soil or organic setups, flushing is generally not recommended since it disrupts microbial activity.
One practical tip: stop all nitrogen supplementation at least two weeks before expected harvest. Excess nitrogen in the plant at harvest contributes to that black ash and chemical taste that marks an improperly finished bud.
Mistake #3: A Fast, Warm Dry
This is the mistake that genuinely devastates quality — and it's extremely common because growers are excited to see the finished product.
A proper dry takes 10–14 days at 60–65°F and 55–65% relative humidity. If you dry faster than this — which happens when temperatures exceed 75°F or humidity drops below 45% — the outside of the buds dry while the inside remains wet. The plant's chlorophyll doesn't have time to break down properly, resulting in harsh, green-tasting smoke. Terpenes evaporate rapidly above 70°F, taking your aroma with them.
Setting Up Your Drying Space
Your drying environment matters as much as your grow environment. Here's what to aim for:
- Temperature: 60–65°F (15–18°C) is ideal. Avoid going above 70°F.
- Humidity: 55–65% RH. A cheap digital hygrometer in the room is essential.
- Airflow: Gentle circulation, not direct fan airflow on the buds. A fan pointed at the wall to move air in the room is the right approach.
- Darkness: Light degrades THC. Keep the drying area dark or use a room with no windows.
If you're drying in the same tent you grew in, an inline fan like the AC Infinity CLOUDLINE T4 set to low speed with the intake partially blocked gives you the right gentle circulation without blasting your harvest dry. The T4's speed controller is particularly useful here — you want minimal airflow, not the full ventilation you'd run during flower.
Hang whole branches rather than trimming individual buds when possible. Whole branches dry more slowly and evenly, giving chlorophyll more time to break down. This approach also makes the final trim easier — dry trim is faster and produces less handling damage than wet trim.
How to Tell When Drying Is Complete
Buds are ready to move to jars when the small stems snap cleanly rather than bending. Larger, main-stem branches should crack but may not snap completely. The outside of the buds should feel dry to the touch but not brittle — there should still be some give and the interior remains slightly moist. This is the ideal window to move into cure jars.
If buds feel bone dry and crumble easily, you've overdried. You can partially recover over-dried flower by adding a Boveda pack to the jar and sealing it for several days, but you won't get back the terpenes that evaporated.
Mistake #4: Rushing the Cure
Curing is where smokeable bud becomes exceptional bud. A proper cure allows enzymatic breakdown of chlorophyll to continue, lets moisture redistribute evenly throughout each bud, and develops the complexity of aroma that makes a well-grown strain memorable.
The minimum cure is two weeks. Most growers agree that 4–8 weeks produces noticeably better results, and some strains — particularly dense indicas — continue improving past three months.
The Burping Schedule
Use wide-mouth glass mason jars. Fill them about 75% full — don't pack them tightly. For the first two weeks, open ("burp") the jars twice daily for 10–15 minutes to release moisture and exchange the air. If you open a jar and smell ammonia, that's anaerobic bacterial activity — spread the buds on a clean surface for a few hours to let excess moisture escape before returning them to the jar.
After two weeks, drop to once daily burping. After a month, once every few days is sufficient.
Using Humidity Packs in Cure Jars
Boveda 62% humidity packs are genuinely useful during cure, particularly if you're storing for longer than a month or if your home environment fluctuates seasonally. They work by both absorbing and releasing moisture to maintain a target relative humidity of 62%, which is widely considered optimal for cured cannabis storage. Drop one pack per quart jar and replace when the pack hardens completely. They're not a replacement for proper drying — if buds go into jars too wet, a Boveda pack won't prevent mold — but for long-term storage and maintaining cure quality, they're worth using.
Mistake #5: Poor Trimming Technique
Trimming affects both the appearance and the smoking quality of your final product. Over-trimmed buds lose sugar leaves that contain trichomes. Under-trimmed buds have excess leaf material that burns harshly.
The goal is to remove fan leaves and the larger, trichome-poor sugar leaves while leaving the small sugar leaves close to the bud intact. These small leaves are coated in trichomes and contribute positively to the final product.
A few practical trimming tips:
- Use sharp, spring-loaded trimming scissors — hand fatigue causes sloppy cuts
- Wipe blades frequently with isopropyl alcohol to prevent resin buildup from dragging and tearing
- Work in a cool room (under 70°F) — warmth softens resin and causes it to smear rather than stay on the bud
- Save your trim. Trichome-covered sugar leaves make excellent hash, dry sift, or infused butter
Mistake #6: Inadequate Pest and Mold Checks at Harvest
Dense late-flower buds are a target for botrytis (bud rot) and powdery mildew, especially in September when outdoor temperatures drop and humidity rises in many parts of the country. States like Oregon, Washington, and the Northeast see significant humidity increases in early fall that can create conditions for mold to develop quickly — sometimes overnight.
Before drying, inspect every bud carefully. Pull apart large, dense colas and look at the interior stem and bud matter. Botrytis appears as gray-brown dusty mold tissue. Any affected material must be removed and discarded — do not dry or cure it with the rest of your harvest. If a bud is partially affected, cut well beyond the visible mold and examine the rest carefully.
Powdery mildew at harvest is more of a quality issue than a safety one, but heavily affected buds should be processed rather than cured whole — water hash or rosin pressing rather than dried flower.
If you're seeing recurring mold or pest issues across multiple grows, the HomeGrow plant diagnosis tool can help you identify patterns and get targeted recommendations based on your setup.
Mistake #7: Not Documenting Your Grow
September is also planning season for next year's outdoor grow and Q1 indoor runs. The single best thing you can do right now is document this harvest in detail while it's fresh.
Record the following for each strain you harvested:
- Dry weight per plant and per square foot of canopy
- Actual days from flip to harvest (for photoperiod) or from sprout (for autoflowers)
- Final nutrient schedule and any deficiencies you noticed
- Trichome state at harvest and your subjective assessment of the finished product at 2, 4, and 8 weeks of cure
- Any pest or environmental issues and how you resolved them
This information makes the decision about what to grow next season vastly easier. If a strain performed exceptionally well, run it again. If it was a struggle, consider whether the issues were strain-specific or environmental.
If you're thinking about what to grow next season, the HomeGrow strain finder can match you with strains suited to your climate, space, and experience level. For seed selection, ILGM's mix packs are a practical choice if you want to try multiple proven varieties without committing to a large order of a single strain — each pack includes three different genetics at a solid discount.
Preparing for Your Next Season
While your current harvest cures, use this window to address anything that didn't work this season. Common post-harvest tasks worth doing now:
- Deep clean your grow space: Bleach or hydrogen peroxide wipe-down of tent walls, fans, and any reusable equipment eliminates pest eggs and mold spores before the next run
- Recycle or replace your soil: Used FoxFarm Ocean Forest can be amended with compost and perlite for a second run, but it should be rehydrated and tested before use
- Review your lighting schedule: If you're planning an indoor winter grow, calculate your electricity costs and determine whether your current light covers your canopy efficiently
- Order seeds early: Popular genetics sell out. If you found a strain that worked well for your setup, source seeds now rather than in January
For growers planning autoflower runs this winter, Fast Buds carries a strong catalog of proven autoflowering genetics — use code HGAPP at checkout for 15% off. Autoflowers are an excellent choice for winter indoor runs because they're independent of light schedule, forgiving of minor environmental fluctuations, and typically finish in 70–85 days from seed.
You can also browse our strain shop for seed options matched to beginner and intermediate grower profiles, or check the HomeGrow growing guide for setup walkthroughs before your next run.
A Note on Legal Compliance at Harvest
As you're processing your harvest, keep your state's plant count and possession limits in mind. California allows six plants per adult 21+, with no limit on the amount of cannabis you can possess at your own residence from a personal grow. Colorado has the same six-plant personal limit. Michigan allows 12 plants per household. These limits apply to your total plant count at any stage, including seedlings — something to keep in mind as you plan your next season's timing.
Check the current rules for your state at HomeGrow's state law pages, which are updated as legislation changes.
Frequently Asked Questions
How long should I dry cannabis before curing?
Aim for 10–14 days in a space maintained at 60–65°F and 55–65% relative humidity with gentle air circulation. The buds are ready when small stems snap cleanly. Faster drying at higher temperatures produces harsher, less flavorful results because chlorophyll doesn't have time to break down and terpenes evaporate quickly.
My buds went into jars too wet and now smell like ammonia. What do I do?
Remove the buds from the jars immediately and spread them on a clean paper bag or drying rack in your drying environment for several hours until the ammonia smell dissipates. Once they're back to a drier state, return them to fresh jars and resume burping twice daily. Catch this early and recovery is usually possible. If you see any gray or brown fuzzy spots, that material should be discarded — it's mold.
Should I do a wet trim or dry trim?
Both work, and experienced growers disagree about which is better. Wet trimming (trimming immediately after cutting the plant) is faster and easier because the leaves haven't curled against the bud. Dry trimming (trimming after 10–14 days of drying) is slower but preserves terpenes better because the sugar leaves curl around the bud and protect it during the dry. For most home growers with small harvests, dry trimming is worth the extra effort.
How do I know if trichomes are cloudy or just clear? They look similar under my loupe.
Clear trichomes have a glass-like transparency and appear to have an empty interior. Cloudy/milky trichomes look opaque and white — like a miniature mushroom that's been frosted. If you're having trouble distinguishing them with a hand loupe, a digital microscope that connects to your phone (available for under $30) gives you a much clearer view and lets you capture photos to compare over several days.
Can I harvest a plant in stages?
Yes — this technique is called staggered or selective harvesting and works well with plants that have significant differences in canopy height or bud maturity. Take the top colas when trichomes are ready, then give the lower buds an additional 1–2 weeks of light to finish. This is particularly effective with strains that produce large main colas that ripen ahead of lower side branches. After taking the top, lower buds often swell noticeably in the final week or two.