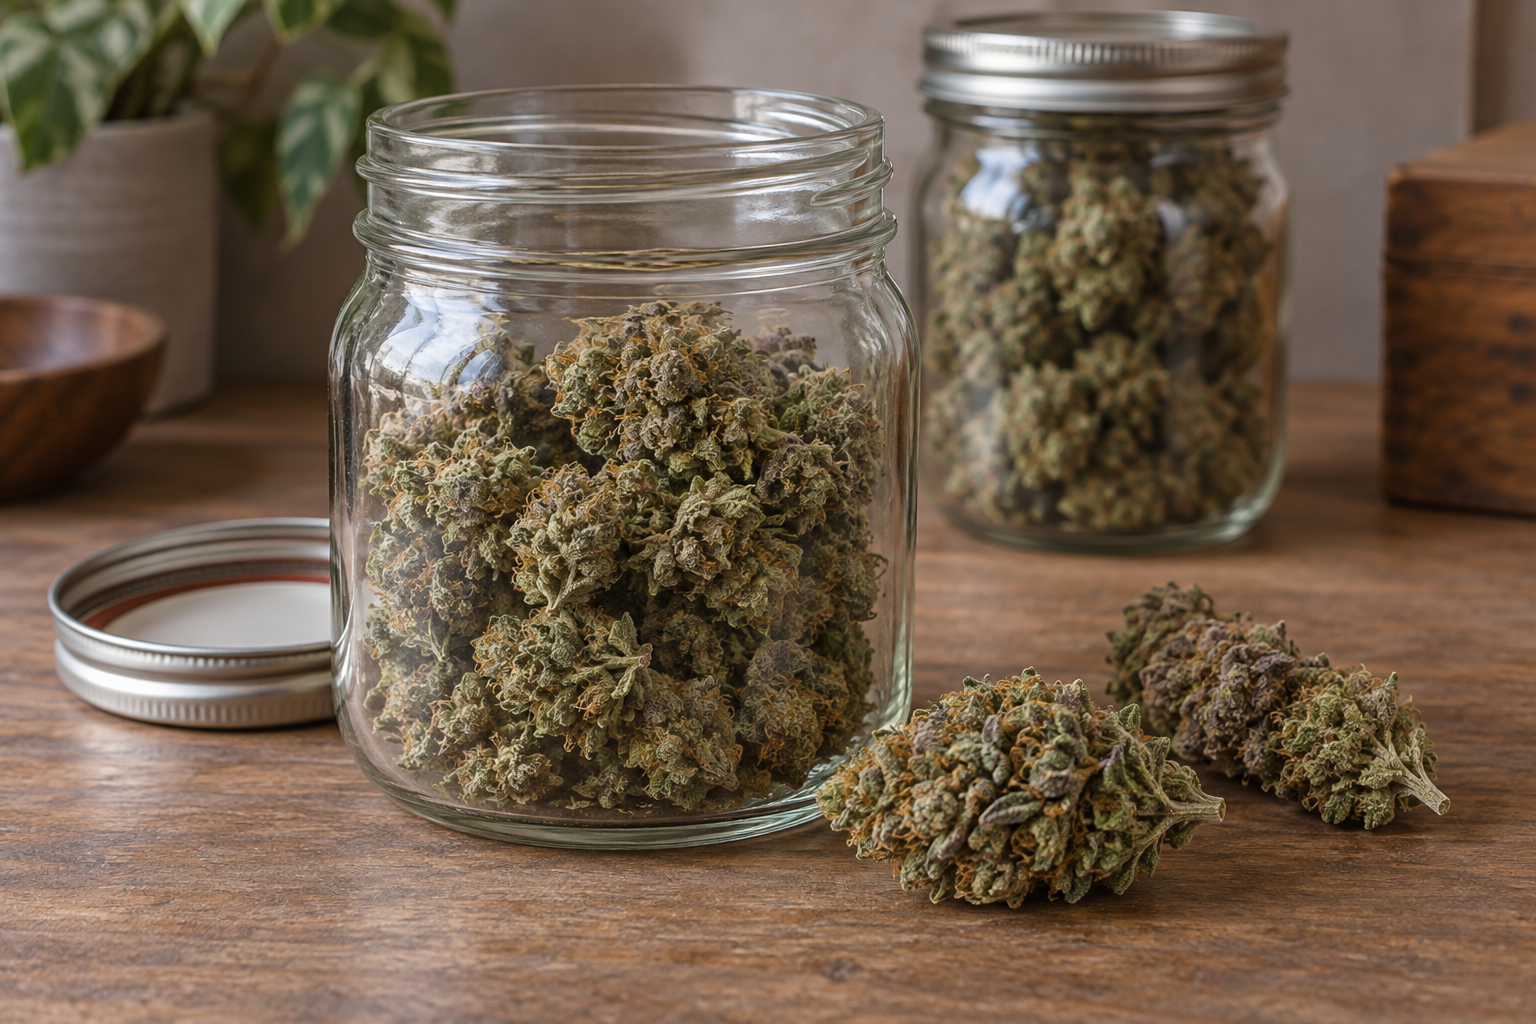
Why Curing Matters More Than Most Growers Expect
You've spent three to five months growing your plants, dialing in your lights, managing pH, and watching trichomes under a loupe. Then harvest day arrives, and many first-time growers make the same mistake: they rush the finish line. They dry their buds quickly, stuff them in jars, and wonder why the smoke is harsh or the flavor is flat.
Curing is where the chemistry of the plant completes itself. Done correctly, it breaks down chlorophyll (which causes that harsh, green taste), allows moisture to redistribute evenly throughout the bud, and creates conditions for terpenes to mature and concentrate. The difference between a two-week cure and a six-week cure on the same harvest can be dramatic — smoother smoke, more complex aroma, and noticeably better effects.
This guide covers the full curing process from the moment you cut your plants down through long-term storage, with specific numbers you can actually use.
Step 1: Drying — Setting the Stage for a Good Cure
Curing doesn't start in the jar. It starts the moment you begin drying. A poor dry will undermine even the most careful curing process, so it's worth getting this right first.
The Ideal Drying Environment
- Temperature: 60–70°F (15–21°C). Cooler temperatures slow the drying process in a good way, preserving terpenes that evaporate quickly in heat.
- Relative Humidity: 55–65% RH. Too dry and the outside of the bud will crisp up before the inside has lost enough moisture. Too humid and you risk mold.
- Airflow: Gentle, indirect. A fan running on low in the room is fine, but don't point it directly at your buds — that creates uneven drying.
- Darkness: UV light degrades THC. Keep your drying space as dark as possible.
Whole Branch vs. Wet Trim vs. Dry Trim
There are three common approaches, and each affects your drying timeline:
Whole branch drying (hanging entire branches with fan leaves on) is the slowest method and often produces the best results in lower-humidity climates. The extra plant material acts as a buffer, slowing moisture loss and giving the bud more time to develop. In a 60% RH environment at 65°F, expect 10–14 days.
Wet trimming (removing all fan leaves and sugar leaves before drying) speeds up the process, which is useful if you're in a humid environment where mold is a concern. Drying time drops to roughly 7–10 days under the same conditions.
Dry trimming is the middle path — you remove fan leaves at harvest but leave sugar leaves on until after drying. This is the approach most experienced home growers use because it balances speed and quality.
How to Know When Your Buds Are Ready to Jar
The classic test: bend a small stem. If it snaps cleanly, you're ready to jar. If it bends and folds without breaking, the buds need more time. The outside of the bud should feel dry to the touch, but the interior should still hold some moisture. When you squeeze a bud lightly, it shouldn't crumble — it should feel slightly spongy in the center. Internal moisture at this stage is typically around 12–15%, which will equalize down to the target 62% RH during curing.
Step 2: The Curing Process Explained
Once your buds pass the snap test, it's time to move them into airtight containers. Wide-mouth glass mason jars are the standard for a reason — they don't impart any flavor, they seal well, and they're easy to find at any hardware or grocery store. Avoid plastic bags or plastic containers for curing; they can hold residual odors and allow micro amounts of gas exchange that disrupt the process.
Filling Your Jars
Fill each jar loosely to about 75% capacity. Overpacking compresses the buds, traps moisture unevenly, and makes proper burping much harder. A one-ounce (28g) harvest fits well into a single quart-sized mason jar with room to spare.
Before sealing, place a Boveda 62% humidity pack in each jar. These two-way humidity control packs are one of the most practical tools in a home grower's kit. They absorb excess moisture when humidity is too high and release moisture when it drops too low, keeping your cure in the optimal 58–65% RH range without requiring constant monitoring. A single 8-gram pack handles a quart jar; use a 67-gram pack for larger containers.
The Burping Schedule
Burping means briefly opening your jars to exchange the air inside, allowing moisture and any accumulated gases to escape. This is the most hands-on part of curing, and the schedule changes over time:
- Days 1–7: Open jars 2–3 times per day for 10–15 minutes each session. During this phase, you may notice a strong ammonia or hay smell when you open the jar — this is normal and indicates active breakdown of chlorophyll and other compounds. The smell should dissipate within a few minutes of opening.
- Days 8–14: Reduce burping to once per day for 10 minutes. The buds should be smelling noticeably better by now — more of their characteristic terpene profile emerging.
- Days 15–28: Burp every 2–3 days. Moisture levels are stabilizing, and the cure is settling in.
- Day 28 onward: If you're using Boveda packs, you can extend burping intervals to once a week or less. Many growers at this stage simply do a weekly check.
Warning Signs During the Cure
Pay attention when you open your jars:
- Ammonia smell that doesn't clear: Indicates anaerobic bacteria, usually from buds that were jarred too wet. Remove the buds, spread them on a rack for a few hours, and re-jar.
- White fuzz or visible mold: Remove affected buds immediately to prevent spread. This is most often caused by humidity over 70% RH or jarring while still too moist.
- Bone-dry, crumbly texture: Your environment is too dry. Boveda packs will help correct this over time, or you can add a small piece of clean orange peel for 24 hours (remove it afterward).
- Condensation inside the jar: Buds were jarred too wet. Open immediately and return to drying.
How Long Should You Cure?
The minimum effective cure is two weeks, but two weeks is really just the starting point. Here's a general timeline of what changes at each stage:
- 2 weeks: Chlorophyll mostly broken down, harshness significantly reduced. Smokeable but not at peak.
- 4 weeks: Considered the baseline for quality. Terpene profile is more developed, smoke is smoother, flavor is noticeably better.
- 6–8 weeks: Where many experienced growers say the real quality emerges. Complexity of flavor increases, effects often feel more nuanced.
- 3–6 months: Long-term curing. Not every strain benefits from this, but dense, resinous cultivars — particularly indica-dominant varieties — can develop remarkable depth with extended curing in proper conditions.
If you can resist the temptation to open your stash immediately after harvest, a six-week cure on well-grown home cannabis consistently outperforms dispensary products that were dried and packaged quickly for retail.
Storage After Curing
Once your cure is complete, long-term storage is about maintaining the conditions you worked hard to create:
- Temperature: Keep below 70°F (21°C). Cooler is better — a temperature-controlled basement or interior closet works well for most US climates.
- Humidity: 58–62% RH for storage. Boveda 62% packs maintain this range passively.
- Light: Complete darkness. Ultraviolet exposure is the fastest way to degrade cannabinoids — a study published in the Journal of Pharmacy and Pharmacology found that light was the single greatest environmental factor in THC degradation.
- Oxygen: Minimize it. Full jars keep better than half-empty ones. If you have a large harvest, fill multiple smaller jars rather than one large jar you open frequently.
Properly cured and stored cannabis maintains potency and flavor for 6–12 months. Beyond that, THC converts to CBN over time — not a total loss, as CBN has its own effects, but not what most growers are aiming for.
Curing for Different Growing Setups
Indoor Grows
Indoor growers have the most control. If you're running a tent setup — like a VIVOSUN 4x4 grow tent — you can repurpose it as a drying space between harvests. Remove your lights and cover the tent floor with a drying rack, then use your existing ventilation to maintain airflow. Just keep the fan speed low and don't exhaust humidity so aggressively that you rush the dry. A dedicated humidity controller on your AC Infinity CLOUDLINE T4 fan makes dialing in the 60% RH drying environment straightforward.
Outdoor Grows
September harvests in most of the US present a challenge: days are still warm but evenings cool down sharply, and late-season humidity varies dramatically by region. Growers in the Pacific Northwest (Oregon, Washington) face high ambient humidity and mold risk. Those in Colorado, New Mexico, or the Southwest contend with very dry conditions that can over-dry buds quickly. In either case, drying indoors in a climate-controlled room gives you more consistency than drying in a garage or shed where temperatures swing.
Autoflower Harvests
Autoflowering strains typically produce smaller, often denser buds than photoperiod plants. Dense buds hold moisture in the center longer, which means they can be trickier to dry evenly. Be conservative with your snap test — give autos an extra day or two in the drying room before jarring, especially if you're in a humid climate. For growers interested in running a fall autoflower crop before winter sets in, check out Fast Buds' autoflower seed lineup — their selections finish in 60–75 days from seed, and HomeGrow readers can save 15% with code HGAPP.
Choosing the Right Strains for Your Next Grow
September is also the time most home growers start thinking about what they'll run next season. If you're planning a spring indoor start or a winter autoflower cycle, strain selection matters as much for curing outcomes as for the grow itself. Cultivars high in myrcene and caryophyllene tend to respond most dramatically to extended curing. Strains with complex terpene profiles — like Zkittlez, Runtz, or Wedding Cake — reward patience with a longer cure in ways that simpler, more monoterpene-heavy strains might not.
If you're not sure where to start, the HomeGrow strain finder helps you match cultivars to your setup, climate, and goals. For seed purchases, ILGM's seed mix packs are a practical option for home growers — you get three proven strains per pack at up to 50% off single-pack pricing, which lets you run multiple cultivars in one season without breaking the budget. Browse additional options at HomeGrow's strain shop.
Quick Reference: Curing Numbers at a Glance
- Drying temp: 60–70°F
- Drying humidity: 55–65% RH
- Drying time: 7–14 days depending on method and environment
- Curing humidity target: 58–65% RH
- Curing temp: Below 70°F, ideally 60–65°F
- Minimum cure: 2 weeks
- Recommended cure: 4–8 weeks
- Burping frequency (week 1): 2–3x daily, 10–15 min
- Burping frequency (week 2–4): Once daily to every 2–3 days
- Long-term storage limit: 6–12 months at peak quality
FAQ
Can I cure in plastic containers or bags instead of glass jars?
It's not recommended for a full cure. Plastic can impart subtle odors over time and doesn't seal as consistently as glass. For short-term storage of already-cured cannabis (a week or less), a quality resealable bag is fine. For the active curing process, stick with wide-mouth glass mason jars. They're inexpensive and widely available at grocery stores, hardware stores, and online.
My buds smell like hay or freshly cut grass — did I do something wrong?
Not necessarily. A grassy or hay-like smell in the first 1–2 weeks of curing is normal. It comes from chlorophyll breaking down, which is exactly what curing is supposed to do. Keep burping on schedule, make sure your humidity is in range (58–65% RH), and give it time. The smell typically transitions to the strain's natural terpene profile by the end of the first two weeks. If the hay smell persists beyond three weeks, your buds may have dried too quickly before jarring.
Is there such a thing as over-curing?
Yes, though it takes a long time. Cannabis cured for more than 6–9 months in proper conditions doesn't so much "go bad" as it gradually loses potency as THC slowly converts to CBN. Flavor and aroma also flatten over very long periods. For most home growers working through a personal harvest over a season, this isn't a practical concern — you'll consume it before it reaches that point. If you're storing a large harvest, check your jars monthly and ensure Boveda packs are still active (they'll harden when spent).
Do I need a humidity pack if I'm burping regularly?
You don't strictly need one, but it makes the process significantly more forgiving. Without a humidity controller in the jar, you're relying entirely on your burping schedule and visual/tactile checks to keep humidity in range. Boveda packs add a passive safety net — if you forget to burp for a day or two, the pack absorbs excess moisture before it becomes a problem. For the cost (a few dollars per pack), it's a worthwhile addition especially for new growers still developing their instincts.
What's the right amount to put in each jar?
Fill jars to about 75% capacity — loosely, not packed. For a standard quart-sized (32 oz) mason jar, that's roughly 25–30 grams of dried, trimmed flower. Overfilling traps moisture unevenly and makes it hard to assess bud condition when you open the jar. If you have a large harvest, use multiple jars rather than fewer larger ones. Consistent jar size also makes managing your burping schedule easier, since conditions will be uniform across your cure.