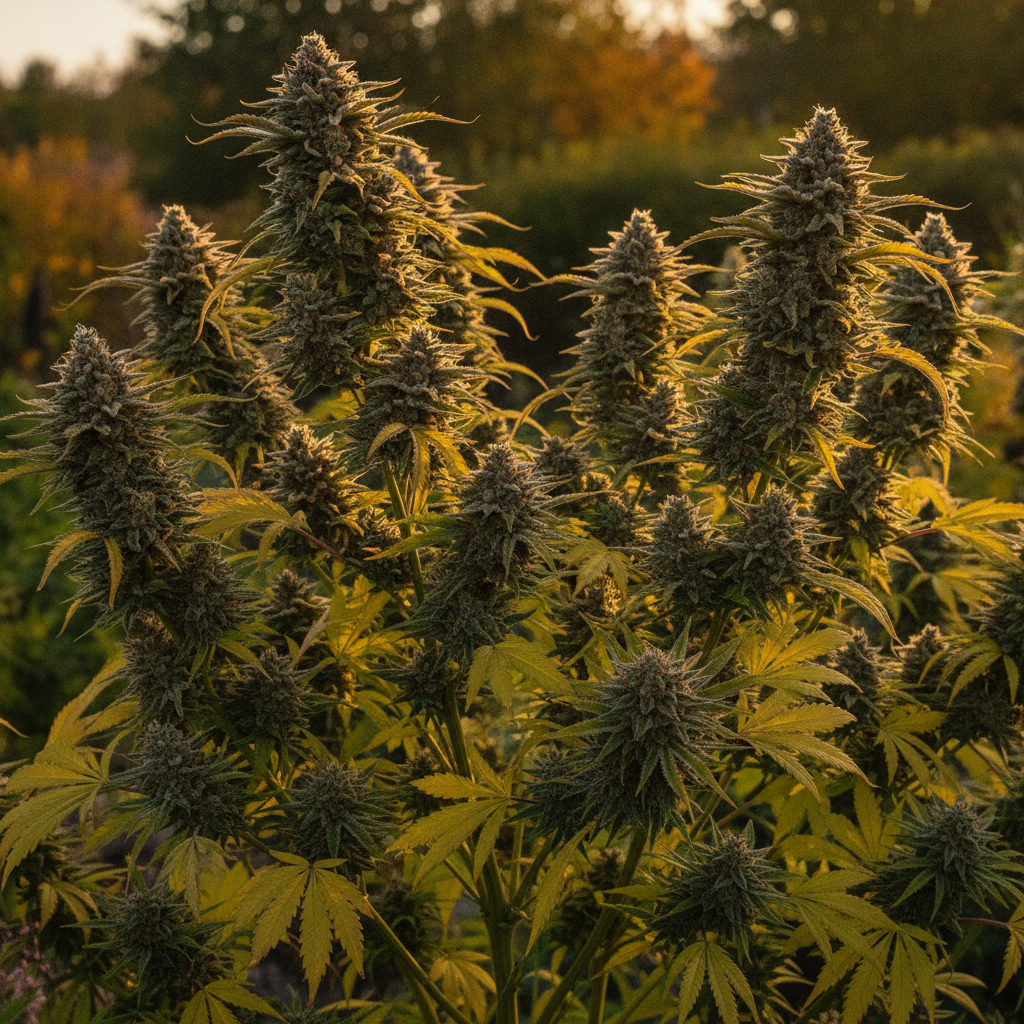
What September Means for Home Cannabis Growers
For outdoor growers across the United States, September is the month everything you've worked toward finally comes together. Depending on your latitude and the genetics you're running, harvest windows open anywhere from early September in northern states like Michigan and Oregon to mid-to-late October further south. Indoor growers on a controlled light schedule aren't bound by the calendar in the same way, but many choose this time of year to wrap up a run and reset their space before winter electricity costs climb.
This guide covers the three things that matter most in September: knowing exactly when to pull your plants, handling the post-harvest process correctly, and using this downtime to make smarter decisions before your next grow. Each section is specific enough to act on today.
Reading Your Plants: When Is Harvest Actually Ready?
The most common mistake new growers make in September is harvesting too early. Excitement is real — after months of work, the urge to cut is strong. But pulling even one week early can mean noticeably lower potency and yield. The plants will tell you when they're ready; you just need to know what to look for.
The Trichome Method (Most Accurate)
Trichomes are the small resin glands that cover your buds and sugar leaves. Under magnification — a jeweler's loupe (30–60x) or a digital microscope works well — they progress through three visible stages:
- Clear/translucent: Still developing. THC precursors haven't fully converted. Harvesting now leaves yield and potency on the table.
- Cloudy/milky white: Peak THC content. Effects tend to be more cerebral and energetic.
- Amber: THC is beginning to degrade into CBN. Effects shift toward sedation and body relaxation. A mix of cloudy and amber (roughly 70/30) is the sweet spot most growers aim for.
Check trichomes on the bud itself, not on the sugar leaves — leaf trichomes amber faster and will give you a falsely advanced reading. Sample multiple buds from different parts of the plant for an accurate picture.
Pistil Color as a Supporting Signal
Pistils — the fine hair-like stigmas that emerge from your flower clusters — change color as the plant matures. When 70–90% have shifted from white to orange, red, or brown, you're typically in the harvest window. This method is less precise than trichome inspection but useful for a quick visual check from a distance.
Fan Leaf Yellowing
Natural yellowing and drop of lower fan leaves near the end of flower is expected and normal — the plant is pulling nitrogen back into itself as it finishes. Don't panic and don't add nitrogen at this stage. If yellowing is rapid, moves upward aggressively, or is accompanied by other symptoms, check HomeGrow's plant diagnosis tool to rule out a deficiency or disease issue before harvest.
Harvest Day: Doing It Right
How you handle your plants on harvest day directly affects the quality of what ends up in the jar. A few non-negotiable basics:
Timing the Cut
For outdoor plants, harvest early in the morning before the heat of the day activates terpene evaporation. If you've been running a flush — discontinuing nutrients and watering with plain, pH-balanced water for the final 7–14 days — make sure you've completed that process before cutting.
Wet Trim vs. Dry Trim
This debate has no universal right answer, but context matters:
- Wet trimming (trimming before drying) is easier mechanically — sugar leaves are stiff and accessible. It's a good choice in high-humidity environments where you need airflow to prevent mold during drying. It also takes up less hanging space.
- Dry trimming (trimming after drying) preserves more terpene aroma during the drying phase because the surrounding leaves act as a buffer against moisture loss. Most experienced growers in dry climates prefer this approach.
In September, regional humidity matters a lot. Growers in the Pacific Northwest or the Southeast may lean wet trim to manage moisture. Those in Colorado, Nevada, or the Desert Southwest often dry trim without issue.
Drying Conditions to Hit
The drying phase is where a lot of growers lose quality. The targets are specific:
- Temperature: 60–70°F (15–21°C)
- Relative humidity: 55–65% RH
- Airflow: Gentle, indirect — a fan circulating air in the room is fine, but don't blow directly on the buds
- Light: Dark or very dim — UV degrades cannabinoids
- Duration: 7–14 days depending on bud density and environment
The small stem snap test is your quality check: when the smaller stems holding individual buds snap cleanly rather than bend, you're ready to move into curing. If they still flex, give it more time. Rushing this stage is one of the most common and most damaging mistakes in home growing.
If you're drying in a grow tent, the AC Infinity CLOUDLINE T4 is excellent for managing airflow and maintaining consistent temperature and humidity during this window — it runs quietly and the speed controller lets you dial in exactly the air movement you need without desiccating your buds.
Curing: Where Flavor and Potency Are Built
We covered curing in depth in a recent post, so this section focuses on the September-specific considerations and the most common mistakes growers make when they're impatient after a long season.
The Burping Schedule That Actually Works
Once dried buds go into airtight glass jars (quart mason jars are the standard), the cure begins. For the first two weeks, open the jars for 15–20 minutes, 2–3 times per day. This releases accumulated CO2 and moisture and prevents anaerobic conditions that lead to off smells or mold. After two weeks, once humidity inside the jar stabilizes at 58–65% RH, drop to once daily, then every few days as the cure matures.
A hygrometer inside the jar is worth having, but if you want a passive, low-maintenance solution, Boveda 62% humidity packs do a solid job of maintaining the target range automatically. They absorb or release moisture as needed and take the guesswork out of long-term storage.
Minimum Cure Time
Two weeks is the bare minimum to notice improvement over freshly dried flower. Four weeks is when most strains really start to open up. Six to eight weeks is where genuinely exceptional flavor and smoothness develop. If you grew a good strain, grew it well, and dried it properly, patience at this stage is the highest-leverage thing you can do.
Closing Out Your Grow Space in September
Whether you're running indoors or out, the post-harvest cleanup window is the best time to address problems you've been working around all season.
Deep Clean Your Grow Room or Tent
Wipe down all interior surfaces with a diluted hydrogen peroxide solution (3% concentration works fine). Remove and inspect fabric pots for root rot or salt buildup. Fabric pots like the VIVOSUN Fabric Grow Pots can usually be hand-washed and air-dried for reuse, but replace any that show mold or significant structural wear. Check your tent zippers, light-proofing, and ducting connections — it's far easier to fix these issues now than mid-grow.
Inspect and Calibrate Your Equipment
pH meters drift over time. If you haven't recalibrated yours in the last few months, do it now. A misread pH can silently cause nutrient lockout for an entire grow season. Check your light fixtures for dead diodes or degraded output, clean your carbon filter if it smells less effective than it used to, and verify your timer is still running accurate cycles. Your equipment checklist on HomeGrow is a useful reference for this audit.
Planning Your Next Grow: Decisions to Make Now
September is the right time to think through next season with a clear head — you're not mid-grow and managing problems, you have fresh memory of what worked and what didn't, and seed banks often run fall promotions with meaningful discounts.
Strain Selection for Your Next Run
The biggest variable in your results is what you're growing. If this season felt like a grind — slow to flower, sensitive to heat or pests, low yield relative to the effort — a strain change might deliver more than any technique adjustment. A few questions worth asking yourself:
- Do you want to harvest faster? Autoflowers finish in 70–90 days from seed regardless of light schedule, which means you can run 2–3 cycles indoors where photoperiods give you one. Fast Buds has a well-regarded autoflower catalog — readers save 15% with code HGAPP.
- Are you growing indoors or out next year? Some strains are bred specifically to resist the mold pressure and temperature swings common in the Pacific Northwest or the humidity of the Southeast.
- Do you want variety? Trying multiple proven genetics in the same run is a good way to learn faster. ILGM's seed mix packs include three strains per pack at up to 50% off and are a practical way to run a comparison grow without committing to a full batch of one variety.
For strain-specific research and growing data, HomeGrow's strain shop and strain finder tool are worth bookmarking. The strain finder filters by grow difficulty, flowering time, yield, and effect profile — useful when you're narrowing down options for a specific environment.
Indoor vs. Outdoor: What Changes in Fall and Winter
If you've been growing outdoors, September wraps up your viable outdoor season across most of the continental US. Growers in Southern California, southern Texas, and parts of Florida have a longer outdoor window, but the majority of legal states are looking at the last harvest of the year.
Moving indoors for winter gives you full control over environment and light schedule, but it adds costs — primarily electricity for lighting. For a 4x4 grow tent, a quality LED in the 200–400W actual draw range keeps bills manageable while delivering real results. Both the Mars Hydro TS1000 and the Spider Farmer SF1000 are solid options in this range — both are dimmable, run cool enough for a sealed tent, and have the full spectrum coverage that photoperiod and autoflower strains both respond to well.
Soil and Feeding Changes Worth Considering
If you ran into nutrient problems this season, the source is often the combination of medium and feeding schedule rather than one or the other. A well-amended starting mix like FoxFarm Ocean Forest carries plants through the first 4–6 weeks without added feeding, which reduces early-stage mistakes significantly. Pair it with a cannabis-specific nutrient line for flower and you're working with a proven foundation.
For feeding during the grow itself, ILGM's cannabis nutrients (Bergman's Plant Food) are formulated specifically for cannabis at each growth stage, which removes a lot of the guesswork around what to feed and when.
Know Your State's Rules Before You Start
Home growing laws vary significantly by state and have continued to change in 2024 and 2025. Plant count limits, canopy size restrictions, and storage caps differ across legal states, and a few states that legalized adult-use consumption still don't permit home growing. Before you start your next grow — especially if you're new to a state or a household situation has changed — verify what's currently legal where you live. HomeGrow's state-by-state guide is kept current with the latest changes.
September at a Glance: Quick Reference
- Trichome harvest target: 70% cloudy, 30% amber for balanced effects; all cloudy for more cerebral; majority amber for sedation-forward
- Drying targets: 60–70°F, 55–65% RH, 7–14 days
- Cure minimum: 2 weeks; 4–8 weeks for premium quality
- Burping schedule: 2–3x daily for first two weeks, then taper
- Storage humidity: 58–65% RH in airtight glass
- Next grow prep: Clean space, calibrate equipment, choose genetics, verify state laws
For a complete overview of the home grow process from seed to harvest, the HomeGrow grower's guide walks through every stage in detail and is a good reference to revisit when you're planning a new run with different genetics or methods.
Frequently Asked Questions
How do I know if my buds developed mold during drying?
Mold during drying typically appears as gray or white fuzzy patches (botrytis, or bud rot) inside dense flower clusters. It often has a musty, hay-like smell distinct from the plant's natural aroma. When you're trimming or handling dried buds, break open any unusually dense or discolored areas to inspect the interior. Affected material should be discarded — don't risk consuming moldy cannabis. Preventing it requires keeping your drying room in the 55–65% RH range and ensuring indirect airflow around the hanging branches.
Can I start a new indoor grow in September or should I wait?
September is a fine time to start an indoor grow. If you're running autoflowers, you can start any time and expect a harvest in roughly 10–12 weeks regardless of the season. For photoperiod strains indoors, you control the light schedule entirely, so the calendar month doesn't constrain you. The main September consideration is whether you want to use your space for drying and curing the current harvest first, which typically takes 3–5 weeks minimum before the space is free. Many growers with a dedicated drying area start their next round of seeds or clones while the current harvest is still curing.
My buds smell like hay after drying. What went wrong?
A hay or grass smell after drying is almost always caused by drying too fast. When moisture leaves too quickly — usually from temperatures above 75°F, humidity below 45% RH, or direct fan airflow — chlorophyll doesn't have time to break down properly. The good news is that a slow cure in sealed jars will improve this significantly over 4–6 weeks. It may not fully recover to where a proper dry would have landed, but it will improve noticeably. For your next run, aim for a slower dry: cooler temps, higher humidity within the target range, and no direct airflow on the buds.
Do I need to flush my plants before harvest?
This is one of the more debated topics in home growing. The traditional argument for flushing (watering with plain pH-balanced water for 7–14 days before harvest) is that it clears residual nutrients that affect flavor. Some growers and researchers argue that properly grown, well-flushed plants show no measurable difference. The practical middle ground: if you've been feeding aggressively and your plants are showing signs of nutrient excess — dark green leaves, chemical taste in early samples — a flush makes sense. If you've been running a light feed schedule on a well-amended soil, the benefit is less certain. In either case, don't skip the final days of ripening just to start flushing earlier.
How long can I store cured cannabis before quality degrades?
Properly cured cannabis stored in airtight glass at 58–65% RH, away from light and heat, maintains good quality for 6–12 months. Terpenes (responsible for flavor and aroma) begin to fade more noticeably after about 6 months, while cannabinoid content degrades more slowly. Freezing is an option for very long-term storage but requires completely dry flower and careful handling to avoid trichome damage. For most home growers harvesting a few ounces to a pound or two, a cool, dark cabinet and quality sealed jars will serve you well through an entire season until next harvest.